
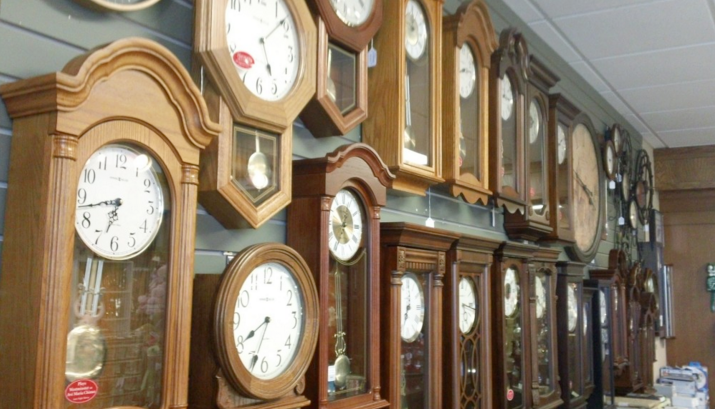
Antique clocks are more than just functional timepieces—they are delicate works of art and history that deserve careful attention and preservation. Whether you’ve inherited a cherished family heirloom or found a vintage treasure at an antique shop, restoring and preserving your antique clock can ensure it remains a centerpiece in your home for years to come.
In this guide, we’ll walk you through the process of restoring an antique clock and share expert tips on how to preserve its beauty and functionality.
1. Assess the Clock’s Condition
Before diving into restoration, it’s important to assess the overall condition of your antique clock. This step involves checking both the exterior (the case, dial, and glass) and the internal mechanism. Take note of any visible damage, wear, or missing parts.
For more valuable or intricate clocks, consider consulting a professional clock restorer for an initial evaluation to determine the level of restoration required and whether specialized tools or techniques are needed.
2. Cleaning the Clock Case
Antique clock cases, whether made of wood, metal, or glass, require careful cleaning to avoid damage:
- Wooden Clocks: Dust the surface with a soft cloth, and use a mild wood cleaner or a mixture of water and vinegar to remove grime. Avoid harsh chemicals that could strip away the clock’s finish or damage the wood. For wooden cases with intricate carvings, use a soft brush to clean hard-to-reach areas.
- Metal Clocks: Use a soft cloth to wipe away dust. For tarnished metal, a gentle metal polish can be applied, but be cautious of over-polishing, which could wear away the original patina that adds to the clock’s value.
- Glass Panels: Clean the glass carefully with a glass cleaner, but avoid getting liquid on the dial or inside the clock. A microfiber cloth works well for a streak-free finish.
3. Repairing the Clock Mechanism
Restoring an antique clock’s mechanism is often the most complex part of the process. Here are some steps to guide you:
- Inspect the Movement: Open the back of the clock and examine the gears, springs, and pendulum. Look for dirt, dust, or rust that may be affecting the clock’s movement. Remove dust gently with a small brush or compressed air.
- Lubricate Moving Parts: Clocks need regular lubrication to function properly, but avoid using household oils. Instead, use clock oil or synthetic oils specifically designed for timepieces. Apply the oil sparingly to the pivot points of the gears.
- Check for Broken Parts: If gears, springs, or other mechanical parts are damaged, you may need to replace them. Sourcing original or replica parts can be difficult, so work with a reputable clock repair specialist or antique dealer who can help you find the correct components.
For intricate repairs, it’s advisable to take the clock to a professional clockmaker, especially if you are unfamiliar with clock mechanisms.
4. Restoring the Dial and Hands
The clock dial and hands are essential to the clock’s aesthetic and functionality:
- Dial Restoration: Over time, clock dials can fade or become tarnished. If the dial is metal, you can clean it gently with a mild cleaner, but for painted or paper dials, restoration should be handled by a specialist. Repainting or retouching a damaged dial is a delicate process that requires experience.
- Hand Repair: Bent or broken clock hands can be carefully straightened using tweezers or pliers. If the hands are beyond repair, you can replace them with period-appropriate replicas.
5. Maintaining the Clock’s Movement
Once the clock is restored, maintaining its movement is key to keeping it running smoothly:
- Wind Regularly: If your clock is mechanical, ensure you wind it regularly according to its specific needs. Some clocks need winding weekly, while others may require daily attention.
- Keep the Clock Level: Antique clocks, especially pendulum clocks, need to be placed on a level surface to function correctly. An uneven position can cause the clock to stop or run inaccurately.
- Avoid Overwinding: Be cautious not to overwind your clock, as this can damage the internal springs. Wind the clock just enough for it to function without resistance.
6. Protecting the Clock from Environmental Damage
Antique clocks are sensitive to environmental changes, and long-term exposure to adverse conditions can lead to irreversible damage. Here’s how to protect your clock:
- Avoid Direct Sunlight: Sunlight can fade wooden finishes, painted dials, and metal surfaces over time. Place your clock in a spot where it’s shielded from direct sunlight.
- Control Humidity: Clocks made of wood and metal can be negatively affected by humidity. Excessive moisture can cause wood to warp and metal to rust, while dry air can lead to cracking. Keeping your home at a moderate humidity level (around 40-50%) helps maintain your clock’s integrity.
- Keep Away from Heat Sources: Heat can cause wooden cases to dry out and split. Place your clock away from heat vents, radiators, or fireplaces.
7. Professional Restoration vs. DIY
Restoring an antique clock can be a rewarding DIY project, but it’s important to know your limits. Minor cleaning and maintenance tasks can be handled at home, but for significant repairs, especially involving the clock’s mechanism, it’s best to seek professional help. Working with a skilled clock repair specialist ensures that your clock will be restored without compromising its value.
Conclusion: Preserving Time and History
Restoring and preserving an antique clock is about more than just fixing its mechanical parts—it’s about preserving a piece of history. With the right care and attention, your clock can continue to mark the passage of time for generations to come. Whether you’re performing simple maintenance or undertaking a complete restoration, the result is a beautifully restored timepiece that holds both sentimental and historical value.
Downloaded the lucky97apk, and it runs really well on my phone. Easy to install and gets you straight into the game. Good stuff. Get it here: lucky97apk
Okkingapp looks like a fun way to spend my free time. Download here: okkingapp
Doch diese sucht Ihr in Online Casinos mit deutscher Lizenz derzeit
vergebens. Insbesondere Klassiker, wie Blackjack, Baccarat, diverse Poker und Video
Poker Varianten (als Bankhalterspiele) oder europäisches Roulette, sind hier zu nennen. Dabei
sind viele klassische Tischspiele nicht nur wesentlich näher am
“echten” Casino Erlebnis dran.
Wer rund um die deutsche Lizenz zu spielen beginnt,
muss leider damit rechnen, dass in Casinos mit DE Lizenz Zahlungswege wie Kreditkarten aus der Auswahl
gestrichen wurden. Anders sieht es in Casinos ohne deutsche Lizenz aus – hier
kannst du rund um die Uhr spannende Live-Dealer-Spiele von Top-Studios wie Evolution oder Lucky Streak spielen. In Casinos ohne deutsche Lizenz kannst
du ohne die strengen Auflagen des GlüStv spielen. Online Casinos ohne deutsche Lizenz – bei
uns findest du nur seriöse Casino Anbieter, bei denen du ohne Einschränkungen um Echtgeld spielen kannst.
Casinos ohne deutsche Regulierung haben insbesondere bei den Spielen deutlich mehr zu bieten als ihre in Deutschland lizenzierten Konkurrenten. Spieler können in vielen Online
Casinos ohne deutsche Lizenz legal spielen.
Dass auch Kryptowährungen eine Rolle spielen können in sogenannten Casinos ohne Lizenz, kann
zusätzlich positiv erwähnt werden. Die deutsche Gesetzgebung hat
so viele Nachteile, dass die deutschen Anbieter lediglich aufgrund der Seriosität punkten können. Ein solches wird niemals
mit einer deutschen Lizenz arbeiten können, das sieht die deutsche Gesetzgebung nicht vor.
References:
https://online-spielhallen.de/robocat-casino-bonus-code-maximale-gewinne-freischalten/
If a promotion requires a minimum deposit, $20 is a common threshold across many offers.
The terms of OZWin Casino can be altered at any time by the company
without giving prior notice to its players. The account page functions from any desktop or mobile device without requiring
an additional specific application. The account setup procedure follows a simple order which accepts
personal information throughout multiple stages through desktop or mobile internet browsers.
Users who have forgotten their account login information can restore their passwords or usernames by using their registered email address as
input at OZWin. The comprehensive gaming library at OZWin Casino becomes available to users only after they complete their login process.
Join Ozwin today and receive a 100% match on your initial deposit along with exclusive
rewards to enhance your gaming experience! This
ensures you’re always in the loop about the latest promotions and bonuses.
The Ozwin Casino lobby offers a Table Games category that
contains variations of classic card games such as poker, blackjack, baccarat, and roulette.
Ozwin welcomes all gambling enthusiasts to the online gaming platform!
Despite a few limitations, its advantages and commitment to player satisfaction make it a strong option for online gaming enthusiasts.
Our support team is trained to recognize signs of
problematic gaming behavior and can connect players with appropriate resources and support
organizations. We provide tools and resources to help players maintain control over
their gaming activities, including deposit limits, session timers,
and self-exclusion options. Many highlight our mobile platform’s quality and the
excitement of our progressive jackpot games. Our player community consistently raves about Ozwin Casino’s generous bonuses, game variety,
and responsive customer service.
References:
https://blackcoin.co/vip-casinos-in-canada-2022/
The focus of Fubo is primarily on sports and what’s happening
live. If you want a big range of shows and some live TV, Peacock TV is the option for you.
If you’d like to try something else—whether
for live TV, added benefits, or simply a new feel—you have many good alternatives.
It doesn’t take much to start using it, you don’t have to sign up, and
you’ll find a lot of different shows and films here across many genres.
I have been part of the company for over 21 years, serving in various capacities.
And now we’ve taken those selections and ranked them by
Tomatometer score, removing some of the ones paired with low Audience
Scores, to create our guide to the 100 best movies on Tubi!
How about at the top, with the 100 best movies on Tubi, ranked by
Tomatometer. Since Tubi integrates with the Apple TV app, everything you watch on Tubi
can be automatically added to your Up Next queue in the Apple TV app, making
it easy to pick up where you left off with a show or movie.
The deal would see Star give up assets, including its 50 per cent stake in the $3.6 billion Queen’s Wharf casino complex, and the Treasury car park and hotel.
Brisbane’s resort and casino precinct Queen’s Wharf has faced financial woes.
He said he would not like to see the company go into liquidation “for the people’s sake”.
Bruce Mathieson, who operates poker machine and pub empire Australian Liquor
and Hospitality with Woolworths, holds about a 10 per cent share in Star and has been interested in buying the Gold Coast casino.
Earlier this month Star confirmed its partners in the Queen’s
Wharf facility — Chow Tai Fook Enterprises (CTF) and Far East Consortium (FEC) —
have offered to buy out its share.
References:
https://blackcoin.co/fast-payout-casinos-the-ultimate-guide-2025/
casino online paypal
References:
https://www.recruit-vet.co.uk/
Hey! I’ve been playing on 90bet lately. They have a great selection of sports betting options. Worth checking out if you are into Soccer! Here is the link: 90bet
888slot apk mang đến giải pháp giải trí toàn diện, từ thể thao, casino đến các trò chơi xổ số với tỷ lệ ăn cực cao. TONY12-30
I liked as much as you will obtain performed proper here. The comic strip is attractive, your authored subject matter stylish. nevertheless, you command get got an edginess over that you wish be turning in the following. sick for sure come more earlier again since precisely the same just about a lot continuously within case you protect this increase.