
Repairing a clock on your own can be a satisfying project if you have the right tools and knowledge. Whether it’s a battery-operated clock, an antique mechanical clock, or a wall clock, understanding the basics of clock repair can save you time and money. Here’s a guide on the essential tools and techniques you’ll need for DIY clock repair.
Essential Tools for Clock Repair
Before starting your DIY clock repair, gather these essential tools:
- Screwdrivers: A small set of precision screwdrivers is crucial for opening the clock’s casing and handling tiny screws inside.
- Tweezers: Fine-pointed tweezers will help you handle small parts, especially if you’re working on delicate clock mechanisms.
- Pliers: Needle-nose pliers can assist with holding and adjusting small components, such as springs and gears.
- Oiler Pen: Clocks, especially mechanical ones, need proper lubrication for smooth operation. Use an oiler pen with specialized clock oil to avoid damaging the clock.
- Cleaning Solution: A clock cleaning solution will help remove dirt, dust, and old oil from the movement. Ensure that the cleaning solution is safe for delicate mechanisms.
- Soft Cloth or Brush: Use these to carefully clean the clock’s exterior without scratching the surface.
- Clock Leveler: If your clock has a pendulum, it’s important to ensure the clock is level to function properly. A small leveler can help with this.
- Hand Puller Tool: If you need to remove or adjust the clock hands, this tool is vital to avoid damaging the dial.
Basic Clock Repair Techniques
a. Battery Replacement
For quartz (battery-operated) clocks, if the clock has stopped or is losing time, the first step is to replace the battery. Always check the positive (+) and negative (-) ends of the battery, ensuring proper orientation.
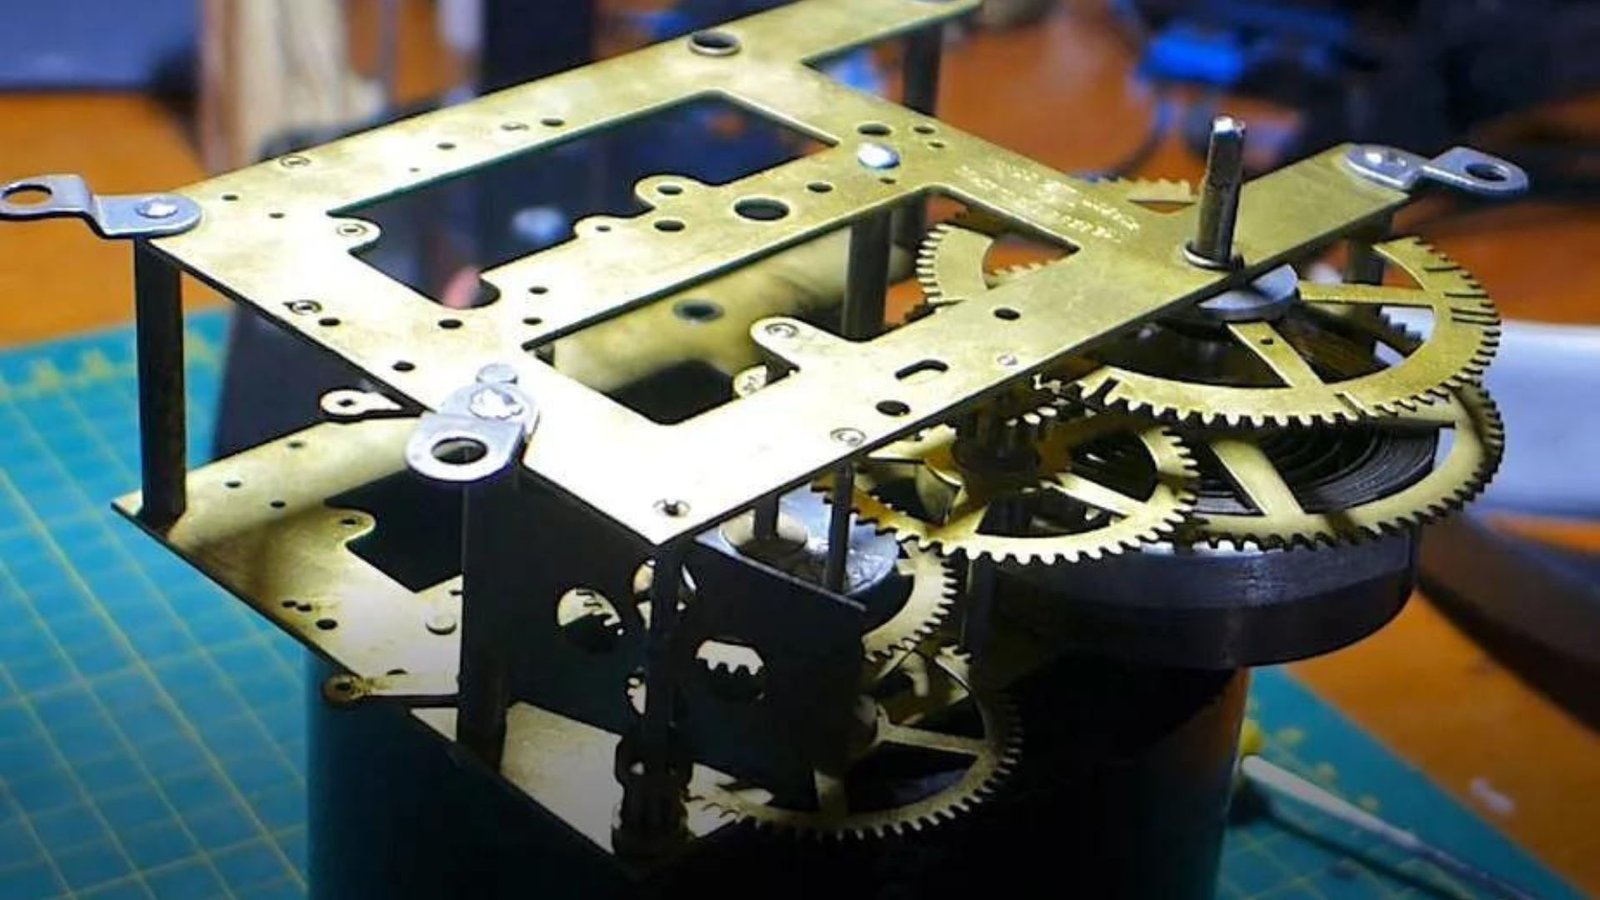
b. Cleaning the Clock Mechanism
Dust and debris can hinder the proper movement of gears and springs. Use a soft brush or cloth to carefully clean the exterior and interior components. For mechanical clocks, remove the movement and gently clean with a clock cleaning solution. Let the parts dry completely before reassembling.
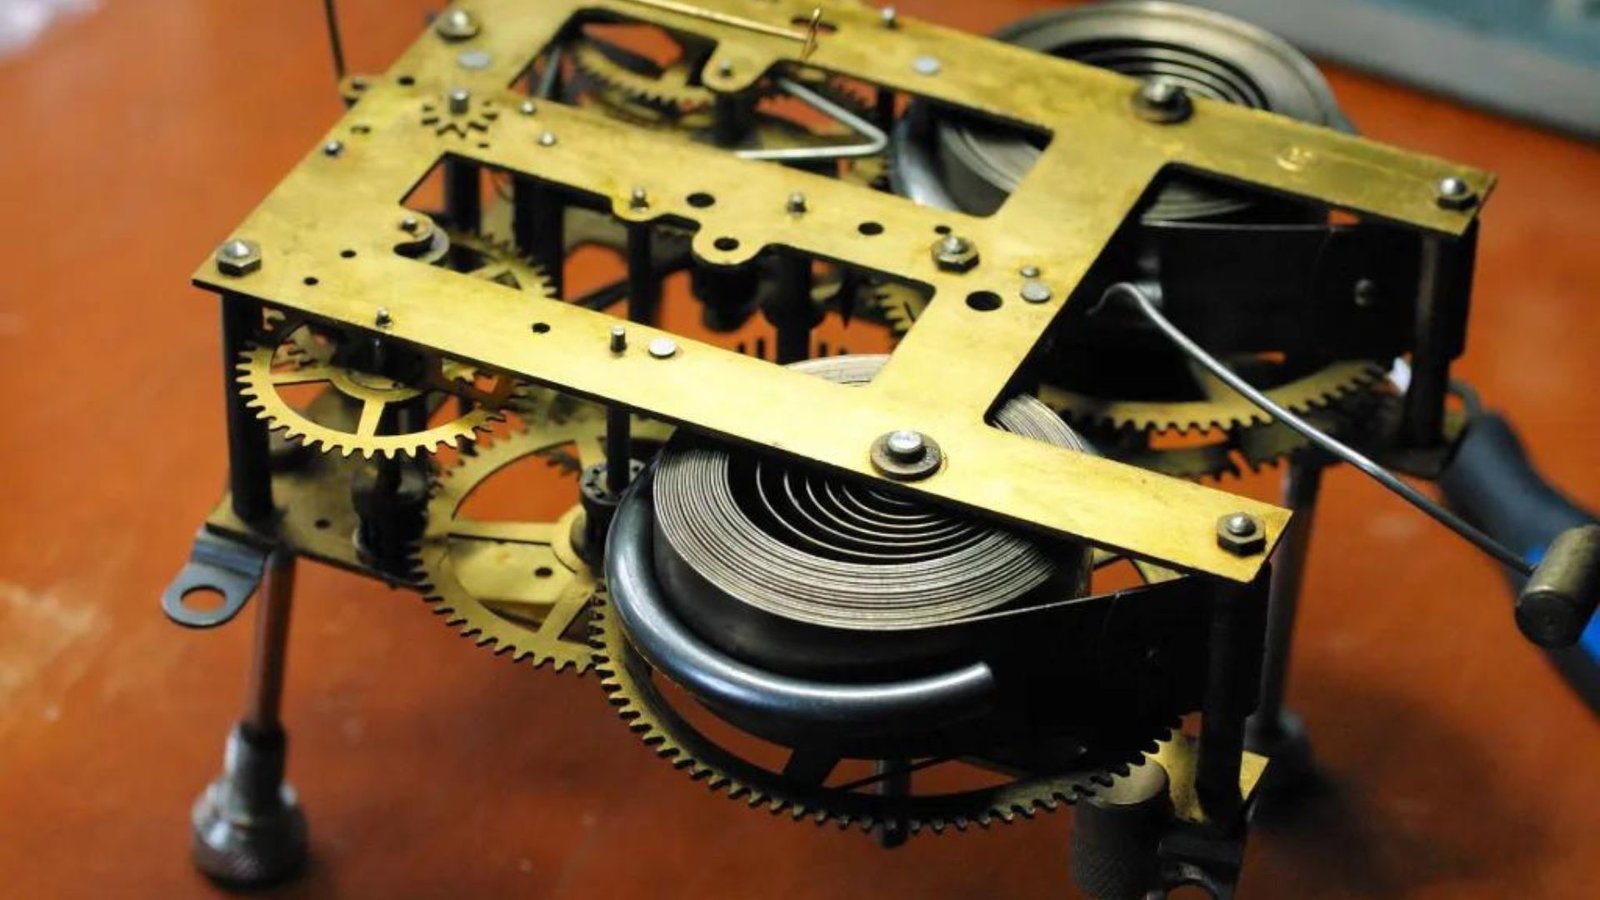
c. Fixing a Pendulum
If your pendulum clock stops working or isn’t swinging properly, it may be due to imbalance or improper leveling. Use a clock leveler to ensure the clock is standing upright. Additionally, check the suspension spring (which holds the pendulum) to make sure it’s not broken or misaligned.
d. Adjusting Timekeeping Accuracy
If your clock is running too fast or slow, you can adjust the pendulum’s length on mechanical clocks. Lengthening the pendulum makes the clock run slower, while shortening it speeds it up. For quartz clocks, check the movement or replace it if the issue persists.
e. Lubrication
Proper lubrication is essential to maintain the clock’s gears and springs. Use an oiler pen to apply a small amount of clock oil to pivot points and gear teeth. Be cautious not to over-lubricate, as excess oil can attract dirt and slow down the movement.
f. Fixing Loose or Bent Clock Hands
If the hands of the clock are not moving correctly, they may be loose or bent. Carefully remove the clock hands using a hand puller tool. Straighten any bent hands and reattach them securely, ensuring they don’t touch each other or the dial.
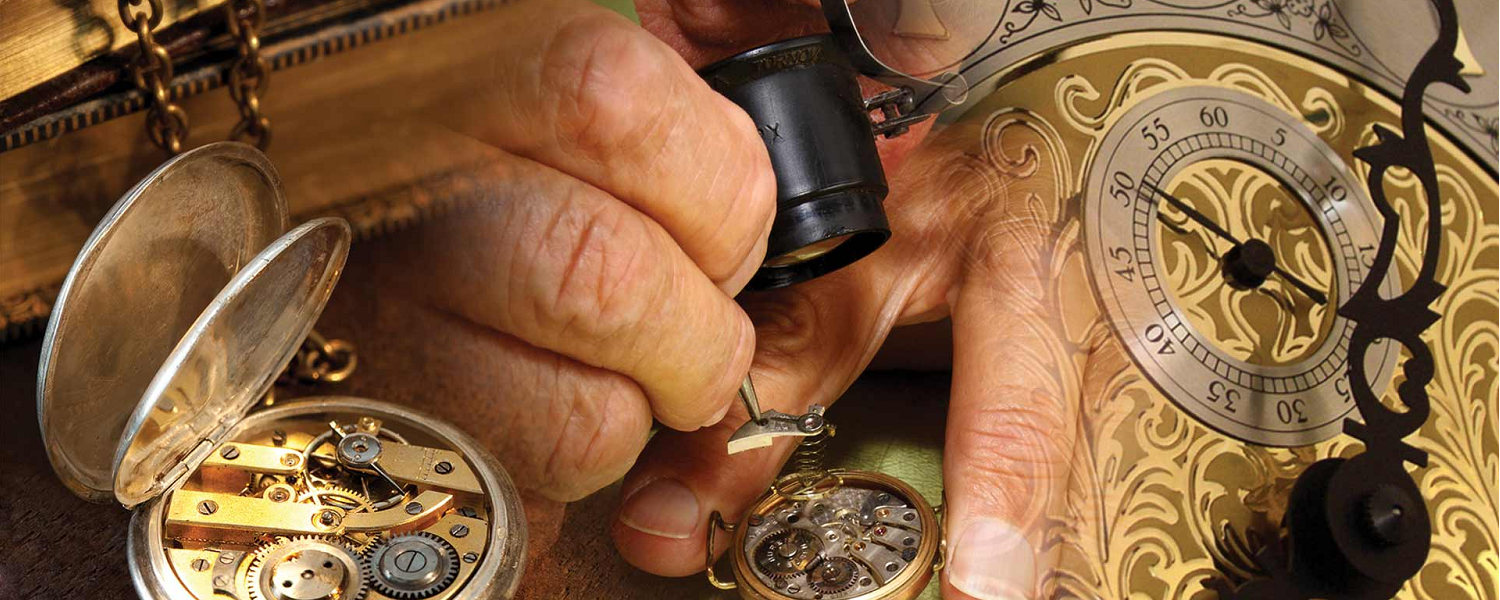
When to Avoid DIY Repairs
While many minor repairs can be done at home, certain repairs may require professional attention, especially for valuable or antique clocks. Issues like broken gears, complex mechanical problems, or severe damage should be handled by a trained clockmaker.
Conclusion
DIY clock repair is a rewarding skill that allows you to restore and maintain your clocks at home. With the right tools, such as screwdrivers, tweezers, and clock oil, along with basic techniques like battery replacement and cleaning, you can handle most minor repairs. However, for more complex issues, it’s always wise to consult a professional to prevent further damage.


Zahlungen via Visa und Skrill werden innerhalb weniger Stunden für Casino-Spiele bearbeitet, jedoch nicht für Sportwetten. Deutsche Spieler sollten die Bedingungen genau prüfen, da Princess Casino derzeit keine Sportwetten in Deutschland
anbietet. Die gestochen scharfe Grafik und benutzerfreundliche Bedienung machen die Tischspiele zu einem Premium-Erlebnis.
Alle klassischen Tischspiele verfügen über flexible Einsatzlimits,
sodass sowohl Anfänger als auch High Roller passende Spiele finden. Besonders beliebt sind
die Live-Tischspiele, bei denen echte Dealer für ein klassisches Casino-Erlebnis sorgen.
Das Princess World Casino geht auf alle Sicherheitsbedenken ein und bietet
eine lizenzierte, sichere und faire Spielumgebung.
Interagieren Sie mit Dealern, chatten Sie mit Mitspielern und platzieren Sie Ihre Wetten mit Zuversicht.
Die Top-Spiele sind das stärkste Merkmal des Princess Casino Online, da es Tausende hochwertiger Titelspiele in mehreren Kategorien bietet.
Egal, ob Sie auf dem High Roller sind oder
ein Gelegenheitsspieler sind, Ihr Gewinnpotenzial ist
für Könige geeignet.
Wenn Sie über automatisierte Tools hinaus Unterstützung
benötigen, wenden Sie sich an den Kundensupport
von Princess Casino. Stellen Sie sicher, dass die verwendete E-Mail aktiv
ist und regelmäßig überprüft wird. Um
Ihre Identität zu bestätigen und ein sicheres Zurücksetzen des Passworts zu ermöglichen, geben Sie den auf dem Bestätigungsbildschirm angegebenen Code ein. Das
System sendet Ihnen einen Code, der nur einmal verwendet werden kann
und innerhalb weniger Minuten in Ihrem Posteingang ist.
Dadurch wird sichergestellt, dass die Spieler sofort zu ihren Sitzungen zurückkehren können und ihre Guthaben sicher bleiben.
Alle Zahlungsmethoden sind weiterhin verfügbar und sicher und der Saldo in €
ändert sich sofort nach jeder Transaktion.
References:
https://online-spielhallen.de/fresh-casino-deutschland-ein-umfassender-erfahrungsbericht/
Dieser High-Limit-Raum mit dem Namen SPIN verfügt über einige Automaten, die bis zu 5.000
Dollar pro Zug kosten. Das ARIA verfügt nicht nur über einen der größten Spielautomatenbereiche auf dem Las Vegas Strip, sondern auch
über einen der exklusivsten High-Limit-Säle in ganz Nevada.
Das Four Queens ist ein Hotel und Casino, das 1966 im Herzen des
alten Las Vegas eröffnet wurde.
Wir waren Ende Sep/Anfang Oktober da waren die Pools offen, im
Winter wird es aber ganz schön frisch – an Silvester sind wir mit Winterjacken,
Handschuhe und Mütze über den Strip gelaufen – da sind Außenpools uninteressant.
Das Hotel verfügt auch über mehrere Pools, in denen Sie sich abkühlen und entspannen können. Das Luxushotel Caesar’s Palace Las Vegas ist aufgrund der zentralen Lage und des
exklusiven Angebotes eine mehr als empfehlenswerte Unterkunft für Ihren Aufenthalt in Las Vegas.
Über 180 Geschäfte sind entlang der Einkaufspromenade
im römischen Baustil angesiedelt. Shoppingliebhaber werden von dem hoteleigenen Einkaufszentrum, den „Forum Shops“ begeistert sein.
References:
https://online-spielhallen.de/fresh-casino-bewertung-eine-umfassende-analyse/
Plus, 150 no wagering free spins on first deposit. Here at Bet & Skill we bring you
all the very best free spin offers. Looking for the best free
spins no deposit? With over 24 years of online gaming excellence, you’ve come to the right place.
Here at 888casino, we want you to start with a WIN!
The platform provides tools to manage deposit limits and session durations, helping you maintain healthy gaming habits while enjoying promotional benefits.
Every aspect of our service acknowledges the distinct needs of players,
from banking preferences to game selection, ensuring
a localized experience that feels familiar and comfortable.
The foundation of exceptional gaming experiences
lies in partnerships with premier casino software providers who deliver innovative and entertaining content.
On our platform you will find different types of slots
and games, which have high RTP and are produced by the most popular providers.
Every aspect of our security infrastructure
is regularly audited by independent third parties, ensuring players can trust their personal information and funds
remain completely protected at all times. Our commitment to
fair play ensures all games operate with certified random number generators, providing genuine winning opportunities.
The multilingual support capability ensures players receive assistance in their preferred
language, with specialized knowledge of Canadian banking methods and regional gaming preferences.
The total weekly bonuses amount could be higher (the best casinos offer at least $5000 worth of ongoing bonuses).
Join today to discover why so many players trust RocketPlay
for their online casino entertainment. Low deposit
casinos are perfect for testing new titles, discovering
your favorite games, and managing your budget responsibly.
As a premier online casino in Canada, we understand the unique preferences
of players. For players seeking unique entertainment, our specialty games section includes diverse options beyond traditional casino games.
Our online slots collection spans thousands
of titles, from classic three-reel games to modern video slots
with multiple paylines and bonus features.
References:
https://blackcoin.co/casino-rsm-club-in-depth-review/
No regulatory body oversees this platform, meaning zero third-party audits verify casino games fairness or dispute
resolution mechanisms. Eleven deposit channels at Mega Medusa online casino accommodate Australian punters—double typical platform
offerings across the online gambling sector. Qualification demands a
minimum AU$20 deposit within 24 hours, unlocking designated pokies like Buffalo Mania Deluxe and Primal Warriors Legacy through email-delivered codes.
Mega Medusa casino distributes complimentary rounds across
select RTG titles for Australian punters.
Mega Medusa Casino AU proudly welcomes every new Australian player with an impressive first-deposit bonus package.
The app will provide instant notifications about new bonuses, free spins, and
exclusive mobile rewards. We are developing a dedicated Mega Medusa mobile app to give Australian players even faster access to games and secure AU$ withdrawals.
The same potent 251% bonus and 53 free spins are yours,
ensuring your crypto deposits work harder for you.
We’re handing you a massive 251% match bonus plus 53 Free Spins on each of those deposits.
References:
https://blackcoin.co/online-gambling-in-sydney-a-comprehensive-guide/
The program activates automatically after your first deposit,
and your progress can be tracked in your account.
Every real-money bet earns points, helping players climb tiers for bigger rewards.
VIP managers provide dedicated support, while special loyalty
rewards make gaming even more exciting. This
cashback offer applies to all games and is automatically credited every Friday.
Built on a reliable and fully licensed framework, our platform ensures fair gameplay and total transparency.
That’s why the site offers a balanced array of traditional and
modern methods, ensuring that each deposit and withdrawal happens
swiftly and reliably. Skycrown casino Australia understands that players often prioritize convenient and secure
payment options. Registering at Skycrown online is an easy process intended for
all players who appreciate efficiency and clarity.
For Aussie players, the site fully supports AUD as both a deposit and withdrawal
currency. And yes, you can still claim a skycrown casino no deposit bonus no matter
which method you use. Once you complete your
skycrown casino login, you’ll find a massive library of games —
no exaggeration. The terms on skycrown casino no deposit bonus codes are laid out clearly.
Baccarat appeals for its elegant simplicity, with quick rounds and straightforward bets on player, banker,
or tie while the dealer handles the rest. If you prefer a quieter, more private experience, you can choose to mute the live chat or observe silently.
Optical Character Recognition (OCR) technology reads game results instantly, ensuring fast payouts and
accurate tracking of each round. Every action—from card draws to roulette
spins—is streamed to your device in real time. Matt is a casino and sports
betting expert with over two decades’ writing
and editing experience. However, withdrawal times can vary depending on the casino’s processing times.
Once you lose a certain amount of money at an online casino, you get a percentage of it back in bonus funds.
Reload bonus is not really a type of bonus
fund but rather a group of bonuses that are meant for existing players.
It’s time for something a little bit more exciting – bonuses at AU casinos online.
You can now make crypto payments at virtually any
real money Australian online casino.
Check our list and the awards assigned to each casino to pick the best one based on your needs.
You won, mission accomplished, now it’s time
to withdraw. Whether you’re playing a positive progression (the Paroli System) or a negative progression strategy (Martingale), you should always proceed
with the utmost caution. Remember when I said I would give you
my own gambling tips that my friends never want to hear about?
References:
https://blackcoin.co/what-to-wear-for-the-casino-dress-code-and-whatll-get-you-kicked-out/
us poker sites that accept paypal
References:
https://praylotto.kr/
online casino that accepts paypal
References:
https://laboryes.com/employer/paypal-gambling-sites-where-its-accepted/
casino mit paypal
References:
https://swifthire.co.za/companies/online-casino-mit-paypal-einzahlung-die-top-casinos-im-vergleich/
paypal casino uk
References:
https://www.revedesign.co.kr/bbs/board.php?bo_table=free&wr_id=319321
mobile casino paypal
References:
https://bhakticonsultaants.com/employer/40-best-australian-online-casinos-for-real-money-in-december-2025/
online pokies paypal
References:
https://findjobs.my/companies/payid-online-casinos-australia-2024/